
Clearly communicating actions to your player is an essential part of a good user interface. Doing this with icons showing the button or key is possibly the cleanest way to do so and is standard practice in many games today.
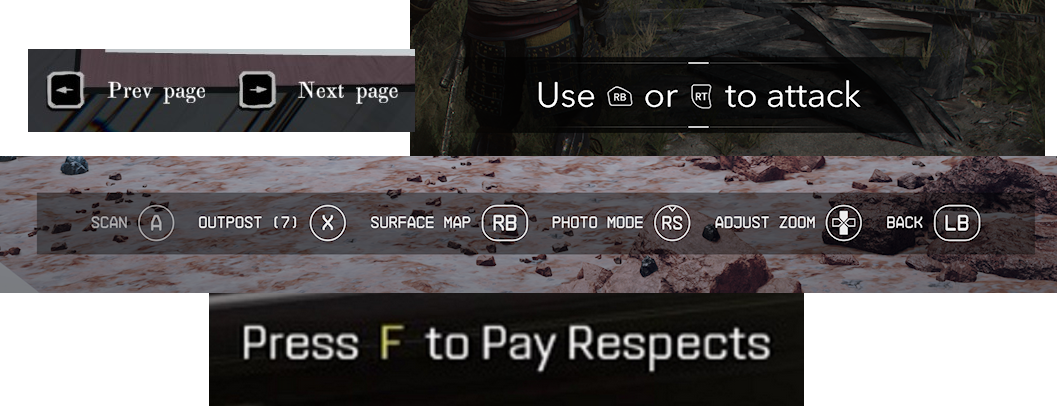
This can be complicated when your game supports a variety of platforms and input methods. The game needs to be able to determine what kind of controller is being used (if any) and be able to display the correct icons in your input prompts. Luckily, all of this is easy to do in the Godot engine thanks to its Input class.
Note: in this tutorial I’ll be using Kenny’s excellent input icon pack, but it is easy to replace these with another set or your own images.
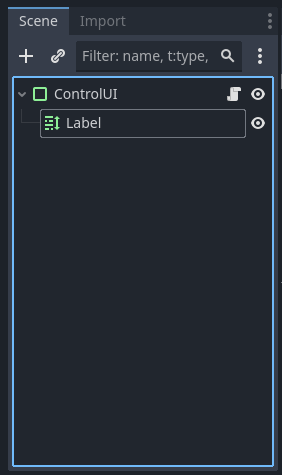
Scene Setup
First, let’s set up a simple scene to display the input prompts. At its simplest there only needs to be a RichTextLabel, but I chose to add a PanelContainer as well to make it easier to see against the background. We are using a RichTextLabel because it allows us to easily insert images into the text using its built in BBCode functionality.
Next, we’ll attach a script to this scene to control the logic. It will have to keep track of what kind of controller the player is using, so we’ll use an instance variable for this.
extends PanelContainer

# Which controller is the player using; empty string for keyboard
var controller_used := ""
Logic
Next we will write some Dictionaries to define what button icons go with which actions. Here I’m using a simple example with 3 actions in my input map: interact_a, interact_b, and use_item. These are constants because there is no way to change the input map for these actions in this simple example. Adding this functionality is left as an exercise for the reader.
# Maps of actions to icons
const keyboard_action_map := {
	"interact_a": "keyboard_r_outline.svg",
	"interact_b": "keyboard_f_outline.svg",
	"use_item": "keyboard_c_outline.svg"
}
const ps_action_map := {
	"interact_a": "playstation_button_color_cross.svg",
	"interact_b": "playstation_button_color_square.svg",
	"use_item": "playstation_button_color_triangle.svg"
}
const xbox_action_map := {
	"interact_a": "xbox_button_color_a.svg",
	"interact_b": "xbox_button_color_x.svg",
	"use_item": "xbox_button_color_y.svg"
}
The scene needs to determine what controller the player is using, and this is where we start using the built-in Input class. Specifically we need get_connected_joypads to see how many input devices there are, and get_joypad_name to get an official name for said device(s).
# Determine what input device the player is using
func _determine_controller(device: int, connected: bool) -> void:
	var joys := Input.get_connected_joypads()
	# If a new controller was just connected, use that
	if connected:
		controller_used = Input.get_joy_name(joys[device])
	# else, if some controller(s) are still connected, use the last of those
	elif joys.size() != 0:
		controller_used = Input.get_joy_name(joys[-1])
	# else, there are no controllers -- default to keyboard input
	else:
		controller_used = ""

	print("Controller used: %s" % controller_used)
We want this function to trigger when the scene is first loaded, and again when there is a change to the devices. This allows the game to dynamically update which set of icons to display if the player adds or removes a controller during gameplay. To accomplish this we can connect our function to the Input class signal joy_connection_changed.
func _ready():
	# Initial call to set controller_used at startup
	_determine_controller(0, false)
	# Connect to signal so controller_used is updated when a new controller is
	# added or disconnected
	Input.joy_connection_changed.connect(_determine_controller)
The next helper function we need is to take the name of an action and return the correct icon based on what type of controller is being used. It returns a path to the image file as this is what we will insert into the input prompt string. Note that this function (and the maps defined above) can be extended to include however many types of controllers you want to use. Here I’m only using Playstation and Xbox to keep the code brief.
# Return the path to the icon for the given action
func _get_icon_filename(action: String) -> String:
	var icons_path := "res://assets/icons/"
	# Decide which icon set to use based on controller_used
	if controller_used.contains("Xbox"):
		return icons_path + xbox_action_map[action]
	elif controller_used.contains("PS"):
		return icons_path + ps_action_map[action]
	else:
		# No or unknown input device, default to keyboard
		return icons_path + keyboard_action_map[action]
Finally we can write the logic to display the input prompt itself. This function takes in a Dictionary of action strings and descriptions. The function should display each one of these in a new line, with the icon for the given action followed by the description.
func set_text(dict: Dictionary) -> void:
# Don't display an empty dict
if dict == {}:
return
# Create a string to display based on dict given
var text = ""
for key in dict:
# Write BBCode string with appropiate icon for the given key, followed
# by the given value
text += "[img=24x24]"+_get_icon_filename(key)+"[/img] "+dict[key]+"\n"
# Display new text
$Label.text = text
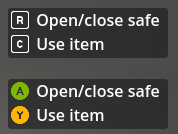
self.visible = trueHere’s how this looks in practice, with both keyboard and Xbox icons:
Lastly, some cleanup. If you want the input prompt to disappear when it’s not necessary, a simple function can handle that
func clear_text() -> void:
	$Label.text = ""
	self.visible = false
Triggering these functions
There are two ways to call these functions to update them within your game code. The first is to call the functions directly. This is best if the UI scene is instanced inside the scene that is setting the prompts.
$ControlUI.set_text({"interact_a": "Open door", "interact_b": "Lock door"})
$ControlUI.clear_text()
The second is to use signals. These should be used if many other objects will be updating the input prompt UI. In this case, suppose the class Player contains the input prompt UI scene, and another class TreasureChest updates the input prompt when it is unlocked:
class_name Player

func _on_body_entered(body: Node3D):
	body.input_prompt_triggered.connect($ControlUI.set_text)
	body.input_prompt_finished.connect($ControlUI.clear_text)

func _on_body_exited(body: Node3D):
	body.input_prompt_triggered.disconnect($ControlUI.set_text)
	body.input_prompt_finished.disconnect($ControlUI.clear_text)
	$ControlUI.clear_text()
class_name TreasureChest
signal input_prompt_triggered
signal input_prompt_finished
func _on_chest_unlocked() -> void:
input_prompt_triggered.emit({"action_a": "Open"})Next Steps
Once a simple input prompt is in place, you can improve it to fit into your game better. Here are some possible improvements to make the input prompt look and feel like an integral part of the game: