
One thing that aspiring game devs tend to ignore is game audio. This is especially evident when rating jam games – audio is almost always the worst category in games I rate. I’m not trying to be mean, I was absolutely guilty of this when I first started as well. This is an unfortunate fact because audio, both sound effects and background music, go a long way toward engaging the player and adding to the world you’re building with your game. Here, I’ll show how to use Godot’s audio busses to elevate your game’s audio without much effort.
What Is An Audio Bus?
Simply put, an audio bus is a way to group several individual audio tracks (or other busses) together and manipulate them all at once. For example, suppose we have one bus named sfx that combines all short sound effects, another named bgm that combines the background music tracks, and a final one called master that combines the other two:
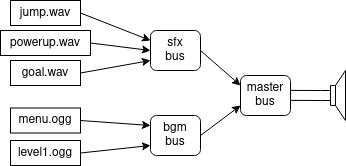
Only the final master bus actually outputs any sounds to the speaker. This cannot be changed in Godot, so make sure all your custom busses are routed to (or output sound to) master if you want them to output any sound!
So Why Use Busses?
The main reason is handling volume. By grouping all sounds together you can make all sounds louder or softer very easily in code, or create sliders for players to adjust audio levels themselves. Whenever you play a game and see separate sliders for sounds and music, this is how the developers accomplish that.
Another useful feature is applying effects to all sounds in a bus. For example, if the player goes underwater, you can apply a low-pass filter to the sound effects bus so everything sounds, well, underwater! Alternatively you can add reverb and delay to simulate a large echo-y space, or use an equalizer to enhance specific frequencies, or any number of other effects. You can read about all of the effects that Godot has available in the Godot documentation.
How Are Busses Used in Godot?
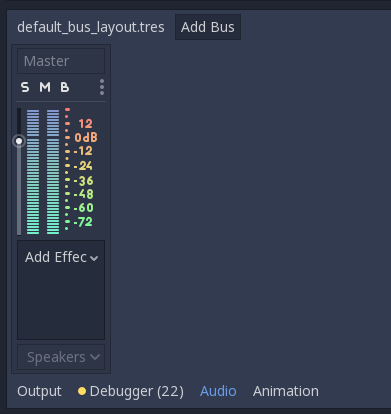
By default, Godot creates a file called default_bus_layout.tres which contains just the master bus. You can see this by clicking the Audio tab on the bottom panel:
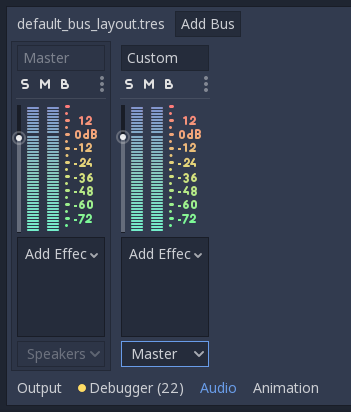
Adding a new bus is simple: click the New Bus button at the top of the Audio panel. This will create a new bus to the right of all existing busses. By default, this new bus will have no effects and will be routed to the master bus.
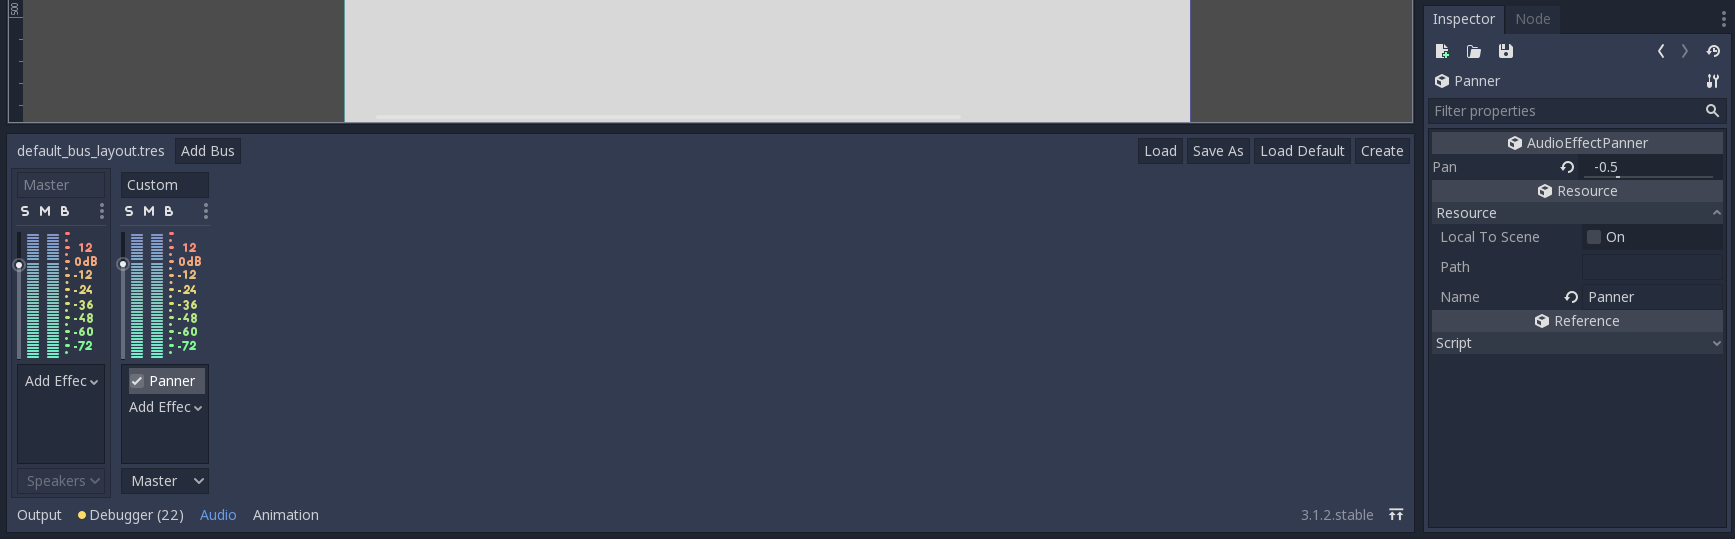
There are 3 main things you can do to tweak a bus from this view. First, you can change the sound level with the vertical slider in the middle. Also, you can change where the bus is routed to using the dropdown menu at the bottom. A word of warning – busses can only be routed to another bus that is to the left of it in the Audio panel to prevent endless loops. Finally, you can use the Add Effect dropdown below the volume slider to add effects. These effects can be modified using the Inspector panel. For example, here I added a Panner effect to the Custom bus, then used the Inspector panel to set the panning halfway to the left:
Once your bus is set up, you can set what bus each AudioStreamPlayer goes to in that node’s Inspector panel:
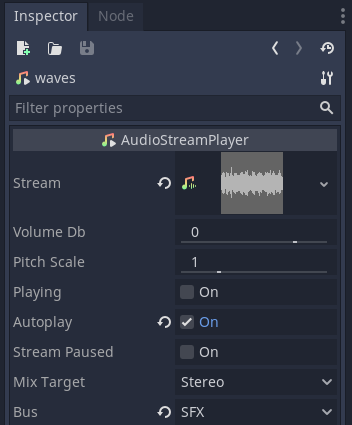
It’s important to note that you should still use the Volume Db property for each AudioStreamPlayer to ensure that all sounds going to the same bus sound correct relative to one another. Having control over the busses doesn’t do any good if one bus is dominated by a single sound!
How Can Busses Be Manipulated in Code?
Setting up audio busses inside your project is nice and makes tweaking audio much easier later on. However, the real power of audio busses comes from changing them while your game is running. To accomplish this, Godot has an AudioServer singleton that contains all the functions needed to manipulate the audio. For example, the set_bus_volume_db function adjusts the volume level of a given bus. Here is an example of this function in action, taken from a jam game I made, where these functions are connected to sliders in the options menu:
func _on_bgm_slider_value_changed(value):
	AudioServer.set_bus_volume_db(AudioServer.get_bus_index("BGM"), value)

func _on_sfx_slider_value_changed(value):
	AudioServer.set_bus_volume_db(AudioServer.get_bus_index("SFX"), value)
Similarly, audio effects can be added, removed, or changed from within the game. For instance, suppose your background music has a chrous effect, and when your player dies you want to remove one of the voices from that effect to audibly illustrate how many lives the player has left:
func _on_player_death():
    var bus_idx = AudioServer.get_bus_index("BGM")
    var effect = AudioServer.get_bus_effect_instance(bus_idx, 0) # Assuming the chorus effect is the only one
    effect.voice_count -= 1
Conclusion
Effects like these add a dynamic element to the game’s audio, making it more immersive and reactive to the player. This kind of audio work can elevate a game from good to great, and it only takes a few lines of code to handle it thanks to Godot’s powerful audio capabilities.