Deciding how to monetize your games is a tricky subject. Having advertisements in your game may be a good way to do this – particularly if the game may not be worth a flat fee to an average player. Unfortunately, the Godot engine doesnt have a built in mechanism for adding ads to your game. Fortunately, Godot is an open-source project with an active community that creates modules to fill in missing functions like that!
Step 1: Creating an AdMob Account
Before you can reap the benefits ads, you have to create an account with AdMob. Signing up is pretty straightforward.
Once the account is created, you’ll have to set up an application and an add a new ad to it. Here you’ll select what kind of ad you want to use. For the first one, I would suggest a banner ad – it’s the simplest one to make and add to your game.
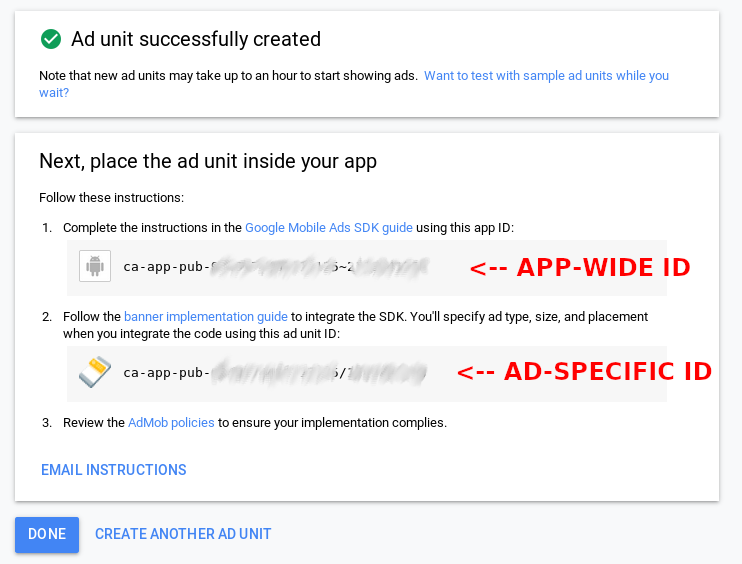
Once your ad is ready to add you’ll see 2 ID numbers that you need to be added to your app. The first is an app-wide ID that will be added to the Android export template in the next step. The second is an ad-specific ID that will be added to the app’s code in step 3.

Step 2: Building the Android Template
While there are pre-made Android templates with the AdMob module enabled, these do not have your app-wide AdMob ID in the Android manifest file. In order to build an app with your ID in place, you’ll have to rebuild the whole thing. Since it’s an app-wide ID, you will have to build a new template APK for each app you want to publish.
First, you’ll need to clone or download 2 repositories. First is the Godot engine itself. Second is the AdMob module. While there are a few, I used the one made by Kloder Games. You can download those like this:
git clone https://github.com/godotengine/godot.git
git clone https://github.com/kloder-games/godot-admob.git
Next check out the version of Godot you used to build your game. For instance, if you used version 3.1.1, you’ll do this:
cd godot
git checkout tags/3.1.1-stable
Copy the AdMob module from it’s repo into the modules directory of the Godot engine:
cp -r ../android-admob/admob modules/Now build the actual template using the SCons build system that comes with Godot. If you haven’t installed it already, look up how to do that in the Godot documentation. Execute the following commands to build libraries for armv7 and arm64v8 devices.
scons platform=android android_arch=armv7 target=release
scons platform=android android_arch=arm64v8 target=release
Note that each of these will take quite a bit of time. Once they’re done, you’ll have to pack those libraries into APK files that can be installed on Android devices. Before doing that, however, you’ll want to put that AdMob ID into the platform/android/java/AndroidManifest.xml file so that AdMob knows to associate your app with your account. You can do this by adding the following lines to the manifest file, replacing the ID number with the one listed in your account:
   <!-- Put this inside the application element, below the other meta-data elements -->
   <meta-data
            android:name="com.google.android.gms.ads.APPLICATION_ID"
            android:value="ca-app-pub-XXXXXXXXXXXXXXXX~XXXXXXXXXX"/>
Now you can build the APK file itself:
cd platform/android/java
./gradlew build
If everything worked correctly, there will be two APK files in the godot/bin directory.
Step 3: Putting an Ad In Your Game
The AdMob module has a pretty comprehensive API in their readme, so I won’t go over the whole thing. The important bits you’ll have to add are these. First, in a global script that’s autoloaded by your game, put the code that sets up the AdMob object and the ad you’re loading:
# Admob variables -- replace ID with your own
const adBannerId01 = "ca-app-pub-XXXXXXXXXXXXXXXX/XXXXXXXXXX"
var usingRealAds = false
var putAdOnTopOfScreen = true
var admob = null

func _ready():
    if(Engine.has_singleton("AdMob")):
        admob = Engine.get_singleton("AdMob")
        admob.init(usingRealAds, get_instance_id())
        admob.loadBanner(adBannerId01, putAdOnTopOfScreen)
Then, in the scene that will show your ad, put the show and hide functions. Here, I’m referencing the global script from above with the Ads class:
func _ready():
    if Ads.admob != null:
        Ads.admob.showBanner()

func _on_scene_change():
    if Ads.admob != null:
        Ads.admob.hideBanner()
    get_tree().change_scene("res://scenes/something_else.tscn")
Notice that all changes to the ads occur inside and if Ads.admob != null check – this ensures that the code will run on all platforms, even if AdMob isn’t actually present.
Step 4: Exporting the Game
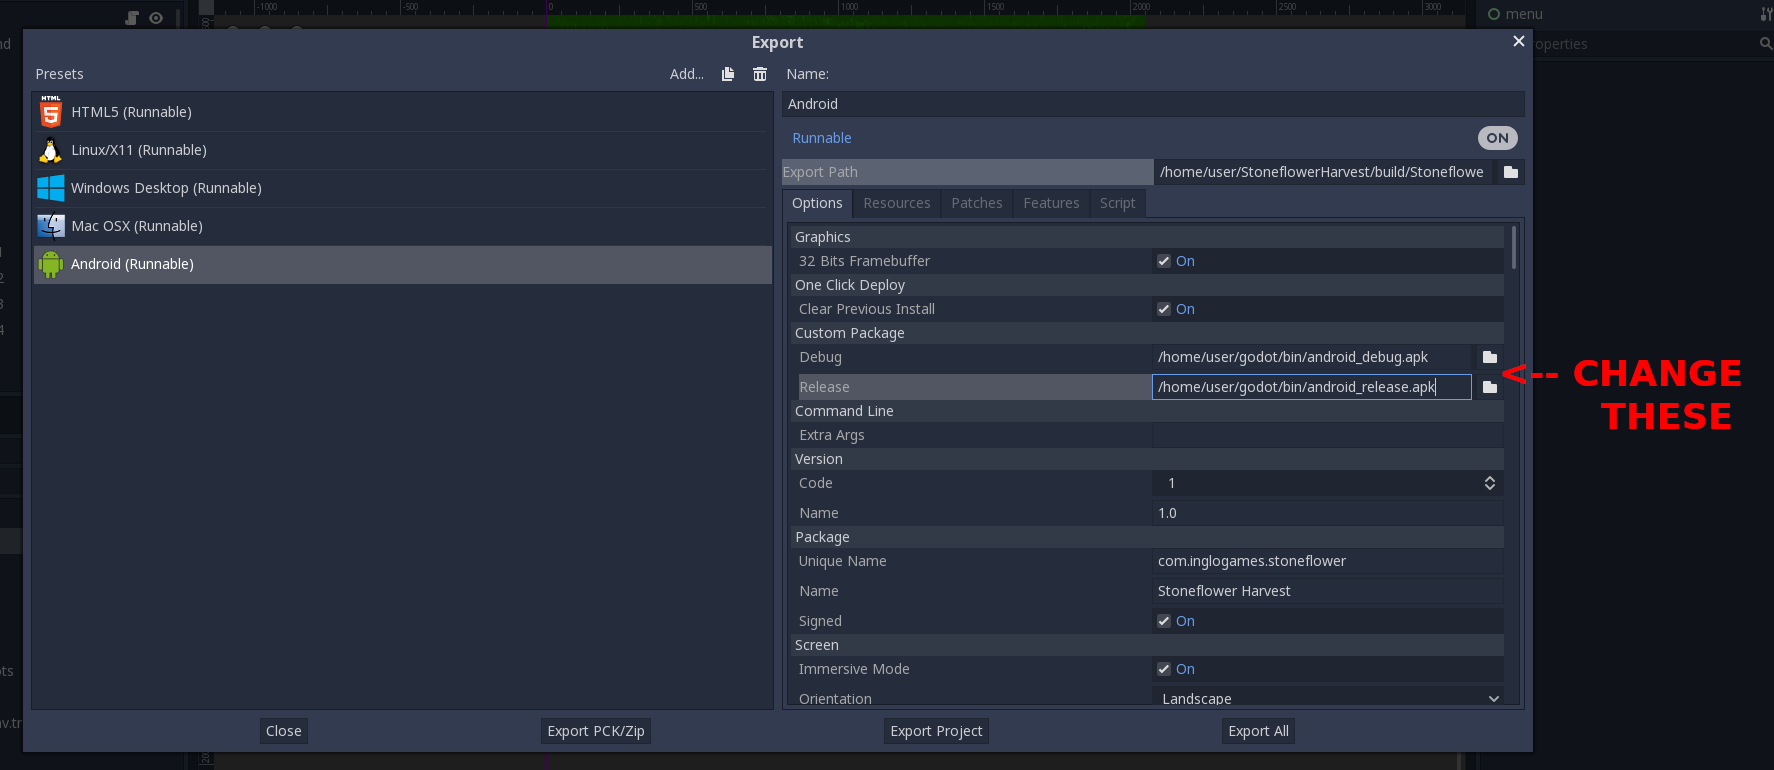
Once your game is ready to export, you’ll have to make sure you set up Godot to use the Android templates you created in step 2. In the export menu, select Android. In the Custom Package section, change both the Debug and Release files to the APKs in the godot/bin directory. Then export your project as usual.

